


Integrating Jira with Gitlab
Moving Jira tickets by creating a branch or merge request


Problem
My team was suffered from taking care of Jira tickets manually, they always needed to remember moving tickets to Code Complete after their coding was done and again remembered moving them to Ready for QA when their PR got merged. So, it was not working most of the time. they forgot to do that on every ticket and our development process was not clear after a while, sometimes they could not remember which ticket was merged or code was completed. So I decided to fix it once and for all.
TLDR
For moving tickets in Jira workflow in Jira Data-Center, installing two Jira plugins called " Git Integration for Jira" and "Automation for Jira - Data Center and Server" are needed. Then we create two APIs in order to create branches and merge requests and setting them for each repository in webhook settings. Finally, we create a rule to listen to the webhook provided by the "Automation for Jira" plugin and detect the type of webhook (either the new branch or merge request), and based on that we move tickets to "Code Complete" or "Ready for QA" lists.
Steps:
- Install Git Integration for Jira from here
- Install Automation for Jira - Data Center and Server from here
- Configure the "Git Integration for Jira" plugin to connect to your main repository account.
- Create an API service to serve as a middleware between Gitlab and Jira
- Add these APIs to your webhook of a repository.
- Create a new rule in Jira to listen to incoming webhook that are fired by API service. and trigger the automation rule.
Solution
To solve the problem, I installed the necessary plugins in Jira. One for connecting to Gitlab and the other one for creating automation rules.
I also created an API service to be as a middleware service between Github and Jira.
Git Integration for Jira Plugin
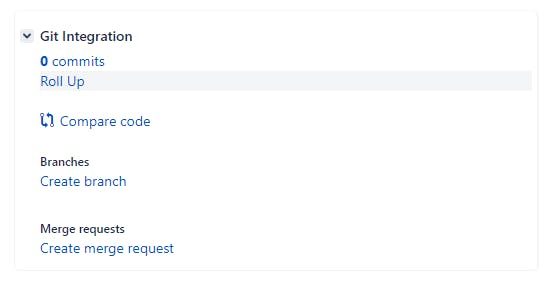
The "Git Integration for Jira" plugin adds new features for creating a branch and a merge request from JIRA.
Installation
- Get the plugin from Atlassian Market Place
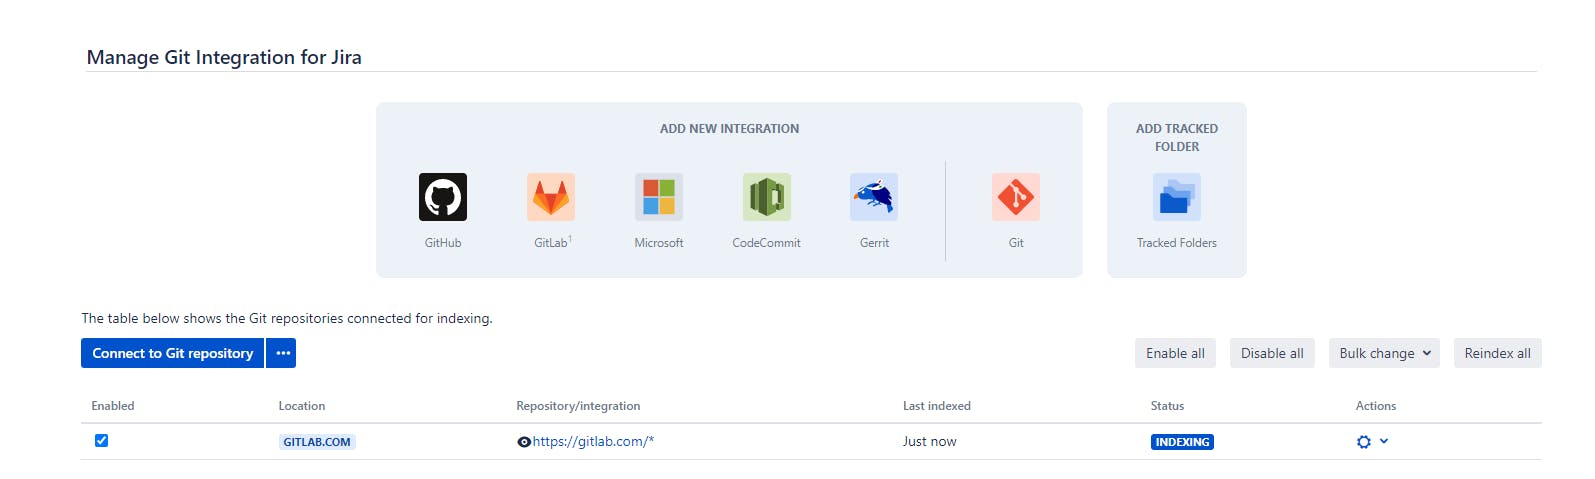
- from the plugin configuration page (yourjiradomain.com/secure/ViewGitRepositori..) Connect your desired repository provider to your Jira
- Get Access Token from your repository account and set it in one of your repository, To do that, from the Toolbar menu click on Git and click on the Repository browser
 In this page you will see all your accessible repositories
make sure you are connected by your main organization account to be able to list all of the repositories for your team
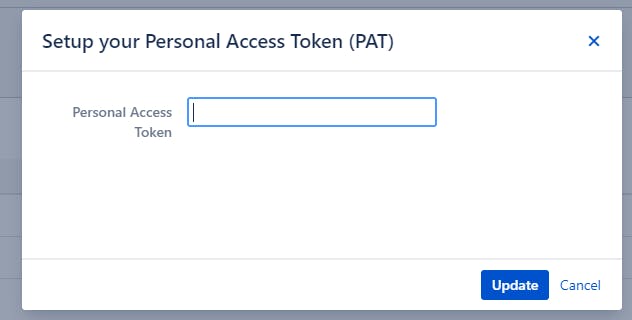
- click on Pers. Access on one of your repository
 And set your Personal Access Token
Now you allow Jira to create branches and merge requests by your account
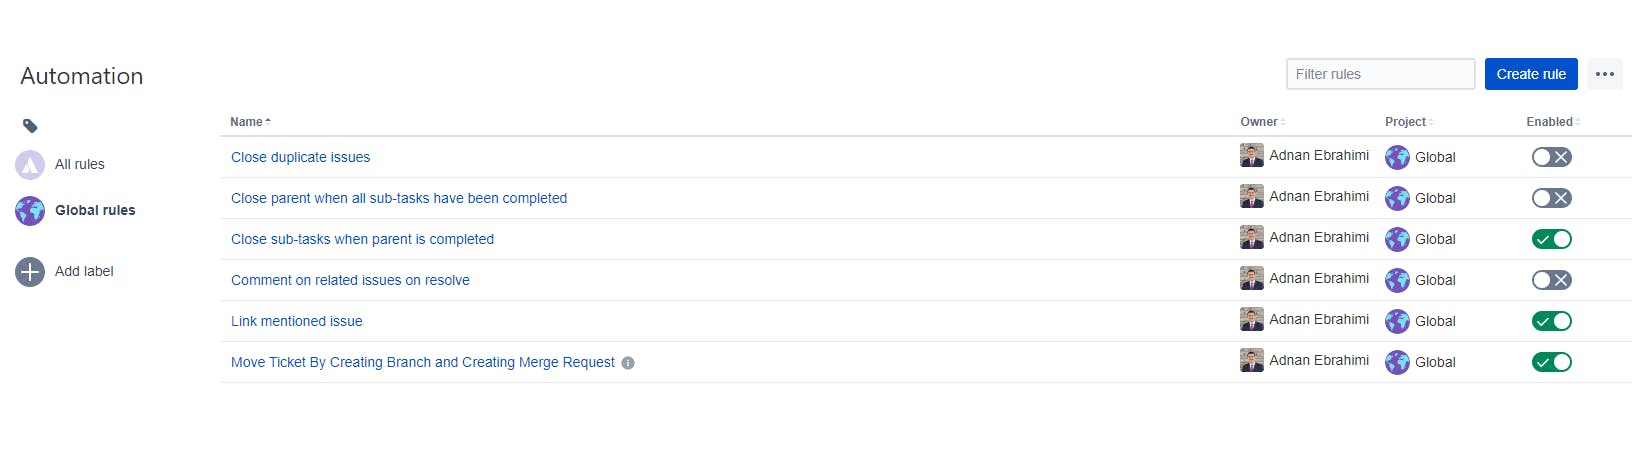
Automation for Jira - Data Center and Server Plugin
This plugin allows us to define automation rules based on events. these events can be triggered from outside of Jira(Webhooks) or inside of Jira (Writing ticket number in the comment section of another ticket or moving parent tickets to another state of the workflow if child tickets are completed and etc.) These rules have two scopes ( Global or Project ) if a rule's scope is set to global, it means this rule will be applied to all projects. Provided that the role's scope is set to project, then we need to define the project(s) for that rule to be applied
 I will show you how to create rules in the next section.
API Service
For creating API Service I used Fastify CLI because it will scaffold a complete structure for me and also it's easy to implement API and of course for its performance.
I created two APIs, One for Merge Request and another one for Create Branch
Gitlab webhook will send you full information of your git action (create a branch, merge request, and so on) You can see the list of webhook events here
Merge Request API:
fastify.post('/merge', async function (request, reply) {
    const resposeGitlab = request.body;
    let config = {
      headers: {
        'content-type': 'application/json',
      },
    };
    const issue = getIssueName(resposeGitlab.object_attributes.source_branch);

    if (
      resposeGitlab.object_kind === 'merge_request' &&
      (resposeGitlab.object_attributes.action === 'open' ||
        resposeGitlab.object_attributes.action === 'merge')
    ) {
      const { data, status } = await fastify.axios.post(
        `https://yourjiradomain.com/rest/cb-automation/latest/hooks/{{hook_id}}`,
        `{
          "issues": [
              "${issue}"
          ],
          "data": {
              "type": "${resposeGitlab.object_attributes.action}"
          }
      }`,
        config
      );
    }
    return '';
  });
Create Branch API:
 fastify.post('/push', async function (request, reply) {
    const resposeGitlab = request.body;
    let config = {
      headers: {
        'content-type': 'application/json',
      },
    };
    if (
      resposeGitlab.object_kind === 'push' &&
      resposeGitlab.before === '0000000000000000000000000000000000000000'
    ) {
      const issue = getIssueName(resposeGitlab.ref);
      const { data, status } = await fastify.axios.post(
        `https://yourjiradomain.com/rest/cb-automation/latest/hooks/{{hook_id}}`,
        `{
          "issues": [
              "${issue}"
          ],
          "data": {
              "type": "create_branch"
          }
      }`,
        config
      );
    }

    return '';
  });
In both APIs firstly, I detected the type of Gitlab Webhook in the for block.
Creating branch is also a Push command however the difference is that, there is no commit yet in the branch so, resposeGitlab.before will equal to 0000000000000000000000000000000000000000
After detecting the type of webhook it's time to send our request with a special payload to the Jira automation hook. In our payload We have an issue array and data object. in the issues we send our ticket number (e.g. ABS-123) this issues number will be detected by our rule from automation and then transitions will be applied on that ticket. In the data, we will send the condition for our rule to move the ticket to Code Complete or to Ready for QA.
Create a rule
In Jira, We create a new rule for detecting the git events and moving tickets to the desired state
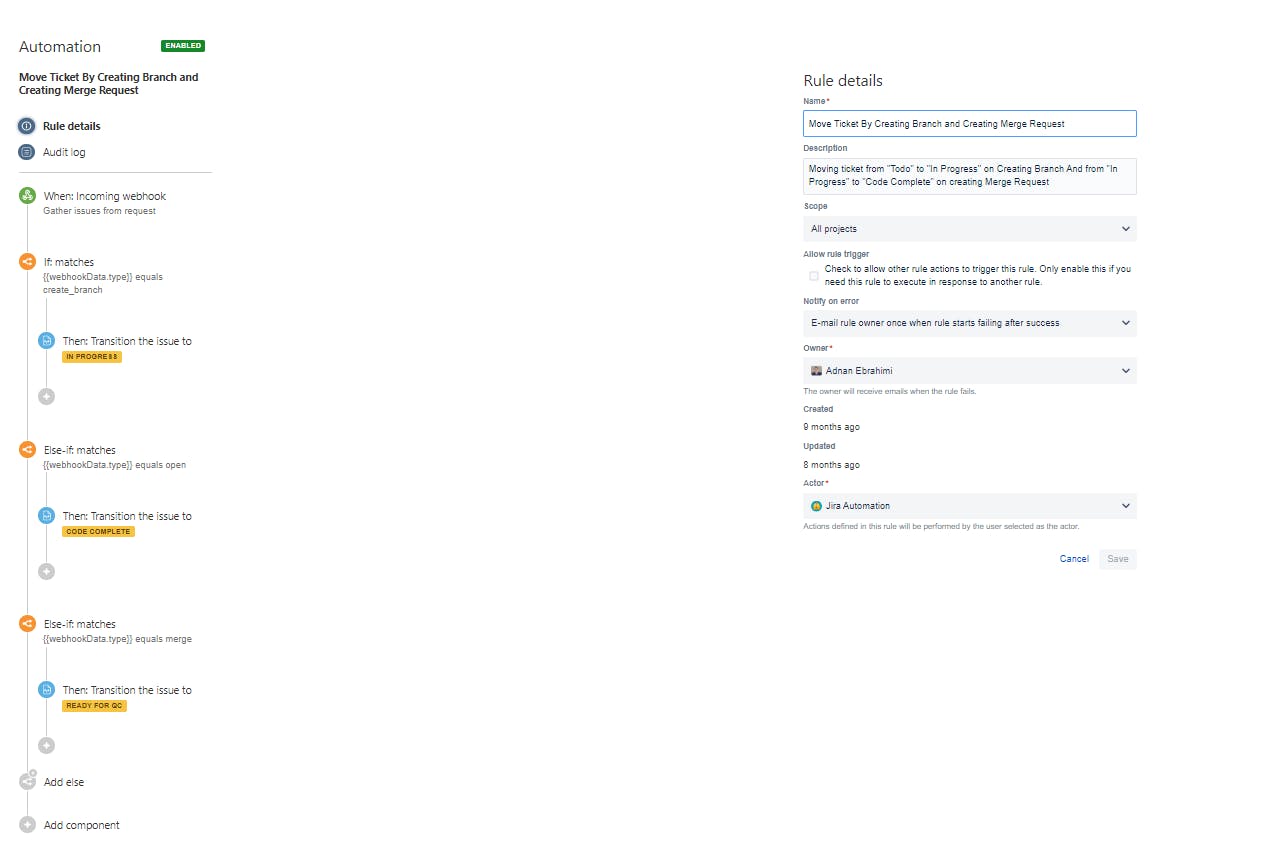
The Rule structure should have:
- When step - the starting point that I choose webhook (Copy the hook address from here and use it in your API service)
- If step - to detect creating branch
- Then step - to move the ticket to In Progress
- Else if step - to detect open merge request
- Then step - to move the ticket to Code-complete
- Else if step - to detect merged merge request
- Then step - to move the ticket to Ready for QA
The type used in If/Else conditions will be detected like this:
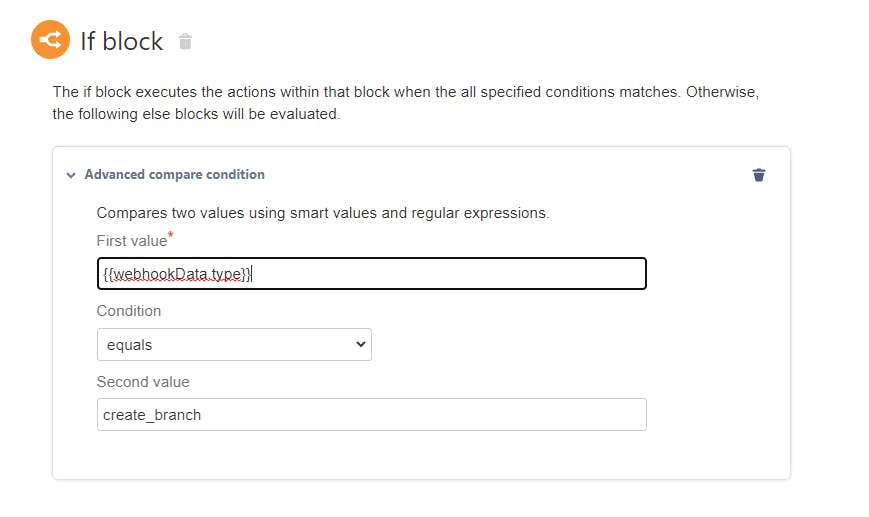 the
the webhookData is a special word that allows us to access the response body
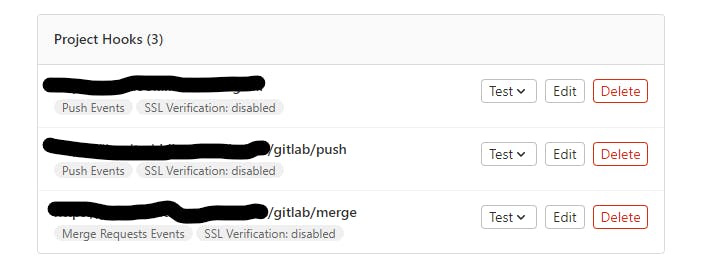
Gitlab Webhook
The final step is to wire up all the things.
- Make your API service online
- Set APIs for Merge requests and Push webhooks of each repository that you want
- From Jira, Create a branch for one of your tickets and see the magic will happen!
Conclusion
This is one of the ways that we can integrate Gitlab with Jira. With this configuration, you can Implement all kinds of GitLab webhooks to do something in your Jira.
I hope you enjoy this article and I will be glad to hear about you how you manage this integration.